
Overview
SKU IQ understands that your inventory data is sacred and we want to guarantee that your data is always secure. It is for this reason that we recommend creating a backup copy of your inventory data prior to performing any functions in SKU IQ such as pushing inventory between your two platforms, choosing to update fields from one platform to the other, or linking previously unlinked items. We recommend backing up as a precaution just in case syncing selections are made incorrectly, source of truth changes, incorrect items are pushed, or unintended deletions occur. This document will explain how to backup your data for each platform.
Click the following links to find your POS and eCommerce platforms and learn how to create an inventory backup file.
POS Platforms:
eCommerce Platforms:
What is a CSV File versus an XLSX file?
A .csv file is a comma separated value file. This is a file that is actually a text file that uses commas to separate values. Each line in the file is a data record (or in your instance, your items' information) with each part of the information separated by a comma. This can then be converted by programs like Microsoft Excel, Google Sheets, or Apple's Numbers programs into a spreadsheet-like appearance.
While this format is very popular, it is not fully standardized and can cause issues when uploading to other platforms due to the lack of standardization. Many platforms recommend using XLSX files instead as they are much more standardized.
XLSX (or XLS for older programs) is the file type used for Microsoft Excel spreadsheets. XLSX files are used to store and manage data like numbers, formulas, text, etc. in your standardized spreadsheet. Each cell in the spreadsheet contains the information you have for each item (each row being for an individual item). XLSX files can be opened in Microsoft Excel, Google Sheets, or Apple Numbers as well.
Note: You will need Microsoft Office 2007 or newer in order to open the XLSX file format. Microsoft Office 2003 or older will not be able to open the XLSX, so you will need to use a different program if you would like to open the spreadsheet after it has been downloaded.
Point of Sale Platforms
Clover
1. Navigate to your Clover Dashboard.
2. On the left hand side, click Inventory.

3. Click on the three dots just under account on the top right hand corner of the screen

4. Click Export.

Lightspeed
1. Navigate to your Lightspeed for Retail Dashboard.
2. Click Inventory from the menu on the left hand side of your screen.

3. Click Item Search at the top of the menu.

4. Click Export at the top right hand side of the list of your products.

5. An automatic download starts. The file will be called “item_listings_local_matches.csv”.
Square
1. Navigate to your Square Dashboard.
2. In the bottom left hand corner, select Items & orders.

3. Click Items from the pop out menu that displays.

4. From your items page, click Actions on the right hand side of the page.

5. From the drop down menu that displays, select Export Library.

6. A popup displays that will ask if you would like to export as a .csv file or a .xlsx file.

7. Use the buttons to select which one you would like to export to and then click Export.

8. This starts an automatic download of your information to the respective file type you chose.
Note: For more information, click here.
Vend
1. Navigate to your Vend/Lightspeed Series X dashboard.
2. On the left hand side menu, click Catalog.

3. This should take you to the Products page automatically. If not, click Products.
4. Click Export List on the right hand side. You may need to scroll down to find this.

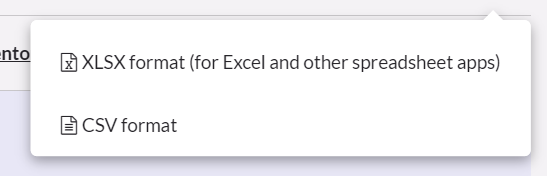
5. Click on the file format you would like to use for your backup download.
6. A popup window displays that asks if you would like to keep working while the file is generated.

7. The file should automatically start downloading. When the download starts, a popup window displays.

eCommerce Platforms
BigCommerce
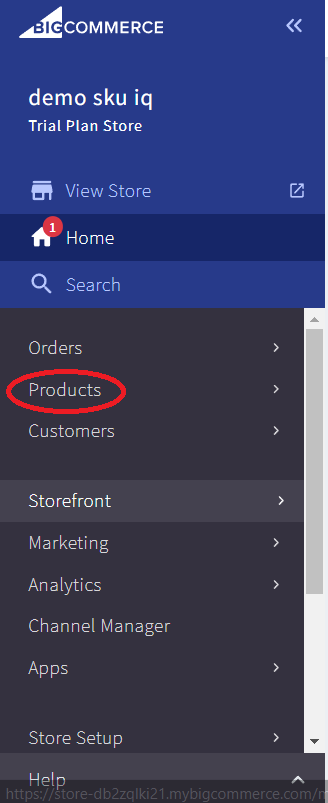
1. Navigate to your BigCommerce Dashboard.
2. On the left hand side of the screen, click Products.
3. Click Export on the left hand side menu that displays after clicking Products.

4. There will be at least (2) options to choose from when downloading your product inventory. We suggest using the Default option.

5. Once you have selected the template you’d like to download with, click Continue.
6. A popup window displays. Click Export my Products to a CSV file to start the list generation. Depending on how many products you have, this can take some time.

7. Once the list is generated, the popup window changes and allows you to download the file.

8. Click Download my Products file and the download starts.
Shopify
Note: If you export up to one page of products (up to 50 products), then the CSV file is downloaded by your browser. If you export more than one page of products (51 or more products), then the CSV file is emailed to you. If you aren't the store owner, then the file is sent to the store owner's email as well.
1. Navigate to your Shopify Admin Panel.
2. Click Products on the left hand side menu of the admin panel.

3. Click Export. It will be on the right hand side of the page, just under your name.

4. A popup window displays. We recommend the following settings:

5. Once you have finished selecting your options, click Export products. If you have more than 50 products, a .csv file will be emailed to you and the store owner. If you have less than 50 products, a .csv file will download through your browser.
Wix
1. Navigate to your Wix store’s dashboard.
2. Click Products on the left hand side menu of the dashboard.

3. Click the Export icon. It looks like a box with an arrow pointing toward the top right hand corner of the box.

4. A popup window displays asking if you’d like to export all products. Click Export.

5. An automatic download starts. The file will be called “catalog_products.csv”.
WooCommerce
1. Navigate to your WordPress Dashboard.
2. Click WooCommerce on the left hand side menu.
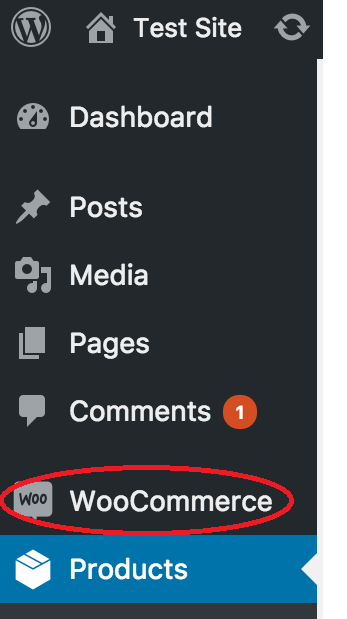
3. Click Products.

4. Click Export in the top left corner.

5. Choose what type of export you want. We recommend Advanced export.

6. Click Export all columns from the dropdown menu.
7. Select the Export all products and Export all categories options, and then click Generate CSV.

8. Wait for the CSV to be generated.

9. Once the CSV is finished generating, click Download File.

10. Your backup is downloaded.